Updated 30/03/2021
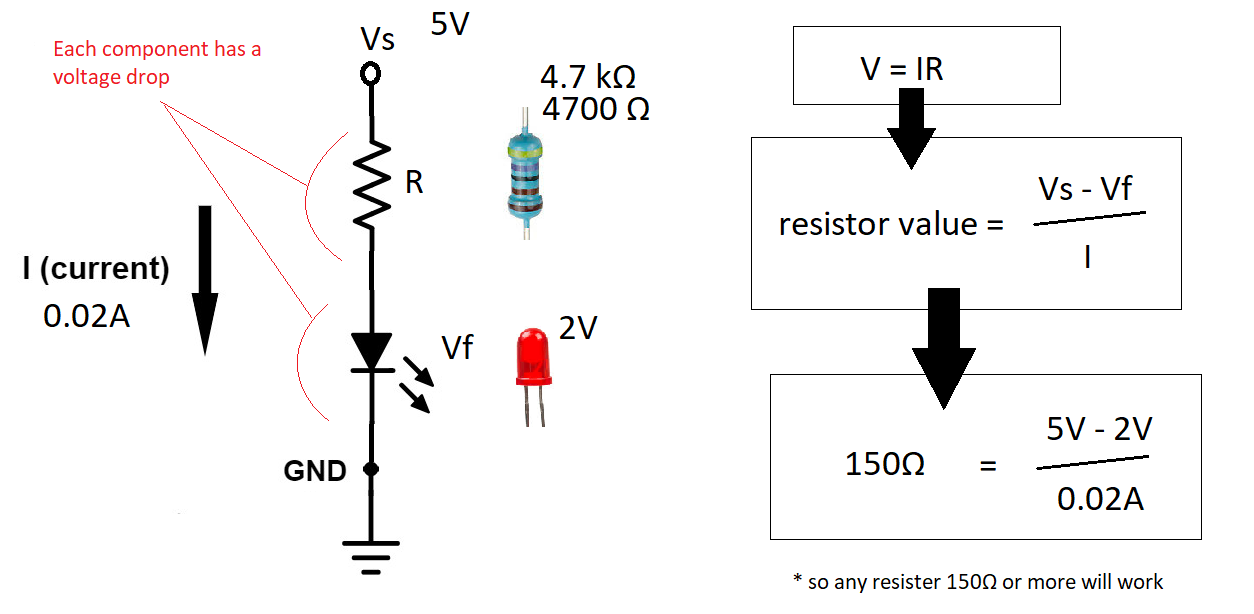
A light-emitting diode (LED) typically has a forward voltage of between 1.8 and 3.3 volts. The simplest way to drive an LED is through a series resistor where energy is dissipated in the resistor as heat.
A LED has a voltage drop specified at the intended operating current. Ohm’s law and Kirchhoff’s circuit laws are used to calculate the appropriate resistor value, by subtracting the LED voltage drop from the supply voltage and dividing by the desired operating current.
1 | Ohms law: V/I = R |
Circuit and components
| Current | Volt Drop |
|---|---|
| Same in each part of the circuit | Voltage drop is the decrease of electrical potential along the path of a current flowing in an electrical circuit. |
General forward voltage drop of LED by colour is as follows:
- 2 volts: Red, Lyme Green, Yellow, Amber & Orange
- 3 volts: Blue, White & Bright Green
This was based on the work from Youtuber BurgZerg Arcade
Ohm’s Law Explained Simply:
C#
Functional code for this is at LedController.cs -> LedService.cs -> GpioControllerRepository.cs which can be summarised as:
1 | var pin = 18; |
Python
1 | import RPi.GPIO as GPIO |