Following on from the post Raspberry Pi Cluster which created a cluster of PI’s and used parallel computing to execute and share the workload using Python … I figured it was time to do the same thing using Docker Swarm.
Docker Swarm is not dead although its long term future is unknown. I’d take Nigel Poulton’s word on this as as he is a domain expert. I figured knowing some Swarm will probably help at some point but DevOps are probably better off focusing more attention on kubernetes as its future is super bright!
On that note… Swarm is simple to setup and has a shallow learning curve. Not all companys need complex container orchestration tools like kubernetes that can automatically replicate to nodes in the cluster under load. With Swarm the replication is done manually with commands like docker service scale.
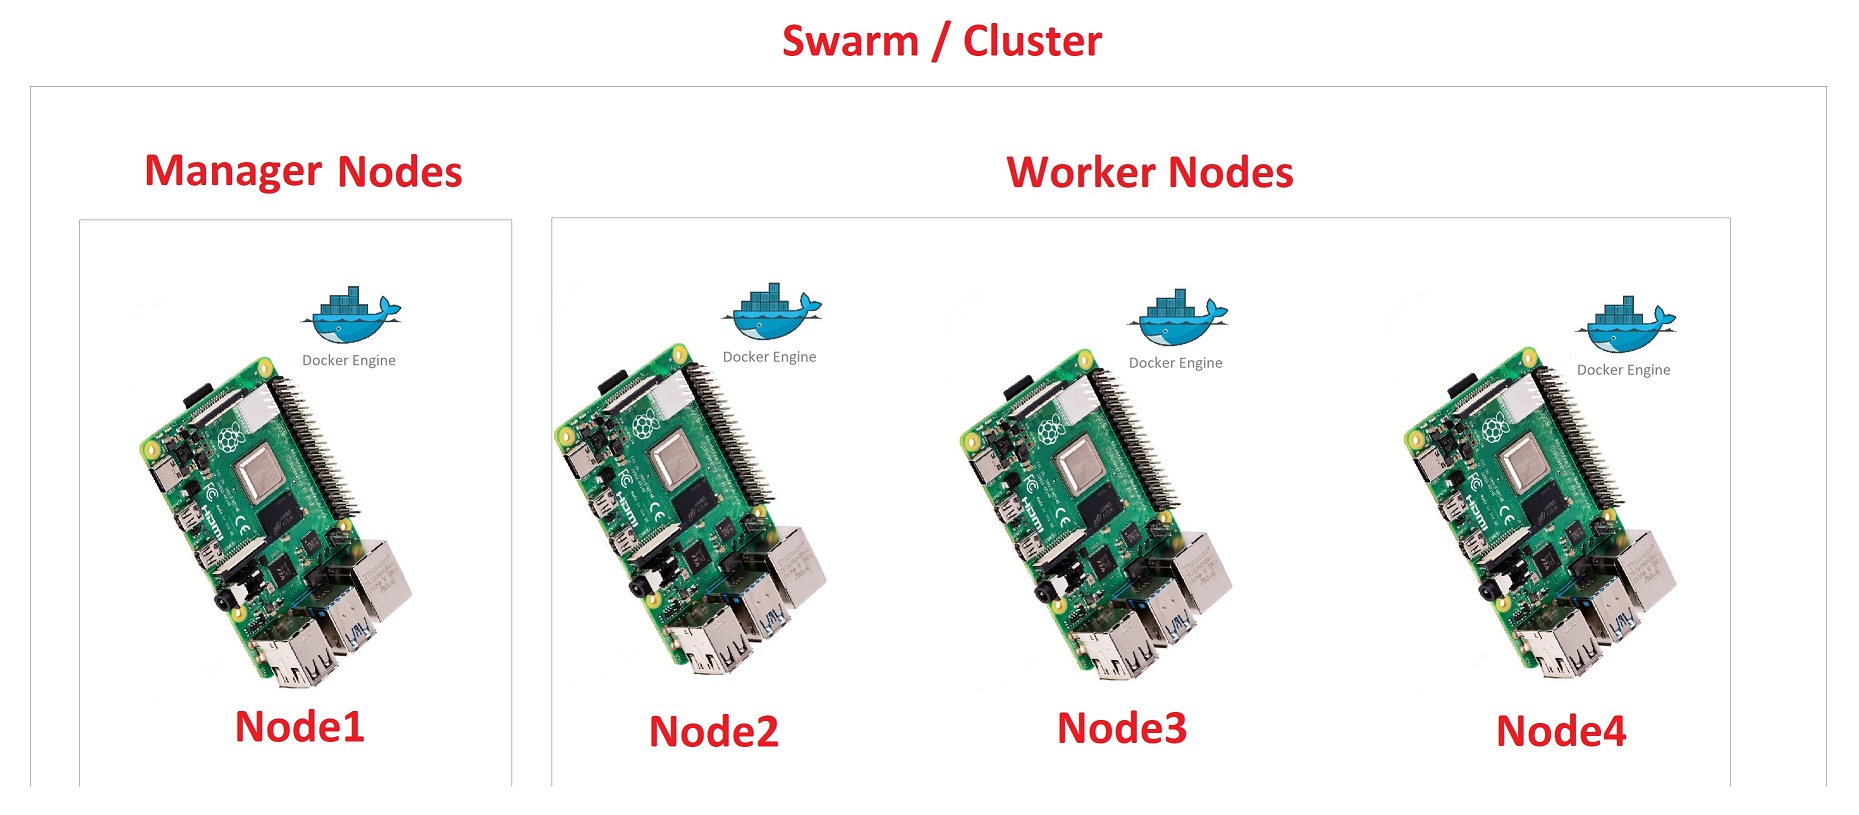
The cluster is made up of 2 or more physical Raspberry Pi 4’s and Docker Swarm has the following common terms:
- Node
- This is the machine that runs and instance of the Docker Engine, this can be a Virtual Machine, PC, Laptop or in my case a Raspberry Pi.
- Swarm
- A cluster of nodes running the Docker Engine.
- Manager Node
- Manages the worker nodes schedules tasks for them to run.
- Its also responsable for the cluster state.
- Note that
Manager Nodescan also run services.
- Note that
- A cluster can have several
Manager Nodes.
- A cluster can have several
- Worker Node
- Instances of the Docker Engine with the responsability of running your application in containers.
- Services
- This is the running container that was created from a Docker Image.
- Task
- A service thats scheduled to run on a node.
“Docker Swarm is an alternative, Docker-native Container Orchestration Engine that coordinates container placement and management among multiple Docker Engine hosts. Docker Swarm allows you to communicate directly with swarm instead of communicating with each Docker Engine individually. Docker Swarm architecturally is comprised of two types of nodes called Managers and Workers. -rancher.com”
Setup
- Follow the OS Steps (For Cluster), for
Docker Swarmthe nodes were:
node1(manager node)node3(worker node)
- Install Docker CE on all nodes using the
piuser. I used Putty to SSH to the nodes as I did it from a Windows Machine.
node1 and node3
If you are not on a Windows machine cannot connect to node1 then run sudo nmap -sn 192.168.1.0/24 to inspect your network, the subnet mask 0/24 and actual range 192.168.1.x will differ depending on your defined DHCP scope.
1 | ssh node1 |
If you want to see what the convenience script from Docker is doing you can grab it and then edit it with nano, I dont particularly care and trust the shell script as its from Docker themselves.
1 | curl -sSL get.docker.com -o get-docker.sh |
Setup Manager
node1
Get the IP address and run swarm init to create a manager node
1 | ifconfig ~ 192.168.1.79 from `wlan0` |
Setup Worker
The token below comes from the swarm init command above.
node3
1 | ssh node3 |
node1
Now running sudo docker node ls shows us our swarm :D
1 | pi@node1:~ $ sudo docker node ls |
First Service
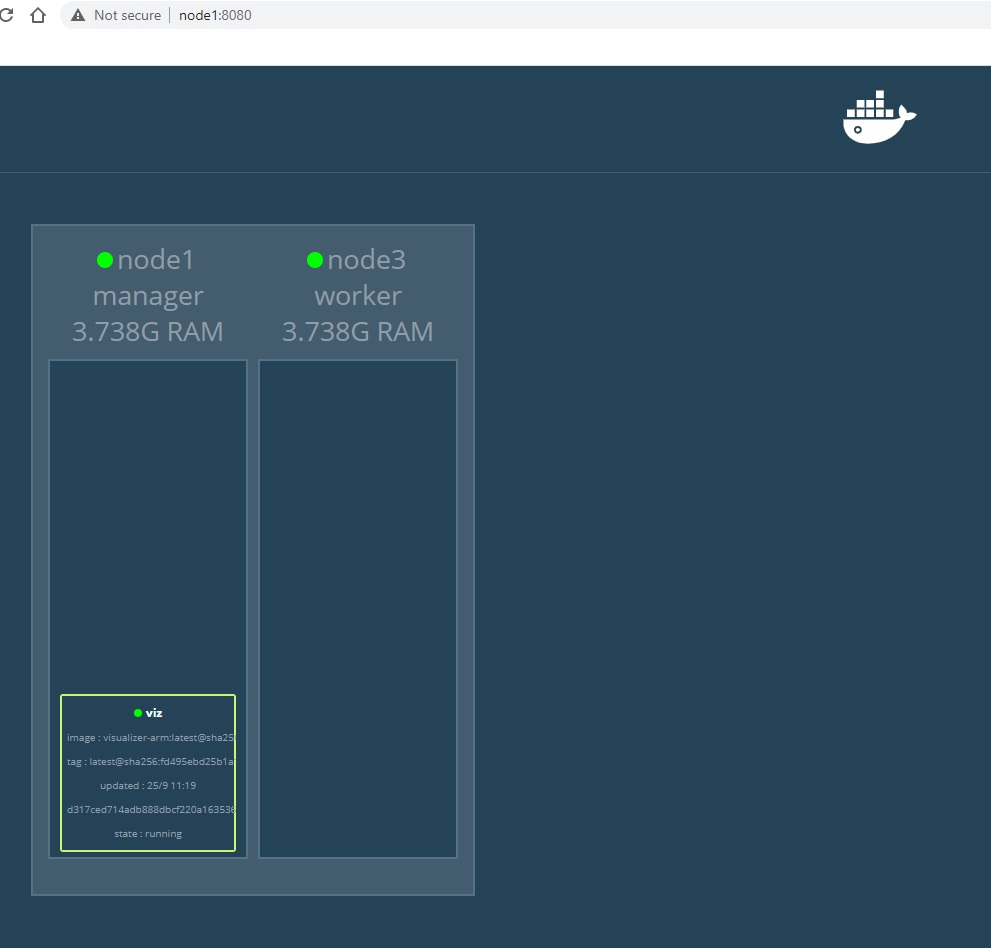
This will install docker-swarm-visualizer a tool to visually see the cluster! Alex Ellis has pushed an image to the Docker Hub as alexellis2/visualizer-arm:latest that works on ARM (Raspberry Pi).
node1
This will take a bit of time to complete as it needs to download the depednancy layers.
1 | sudo docker service create --name viz --publish 8080:8080/tcp --constraint node.role==manager --mount type=bind,src=/var/run/docker.sock,dst=/var/run/docker.sock alexellis2/visualizer-arm:latest |
You can then check the service is running with sudo docker service ls
1 | pi@node1:~ $ sudo docker service ls |
The UI is then avaible at - http://node1:8080/
Nginx Services
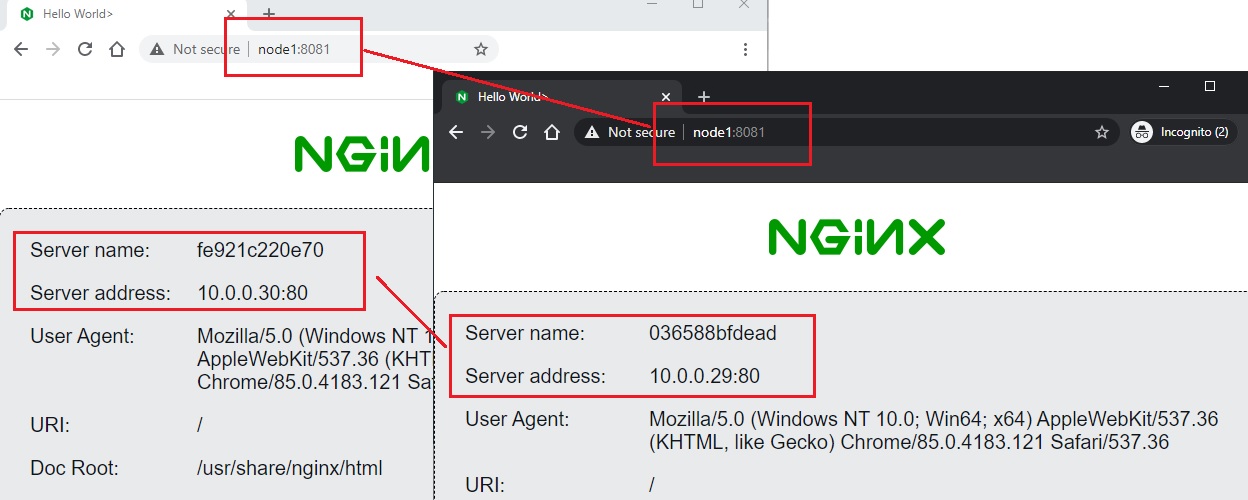
The examples below use the image carlpaton/nginx-pi-demo to display some information about the host node, this is useful as we can then see the Server name and Server address changes. Details about this image and how I created it can be found at nginx-pi-demo.
When you create a service you can initialze it with --replicas n where n is the amount of running instance you want. The below will create 2 instance of nginx-2
1 | docker service create --replicas 2 --name nginx-2 -p 8081:80 carlpaton/nginx-pi-demo |
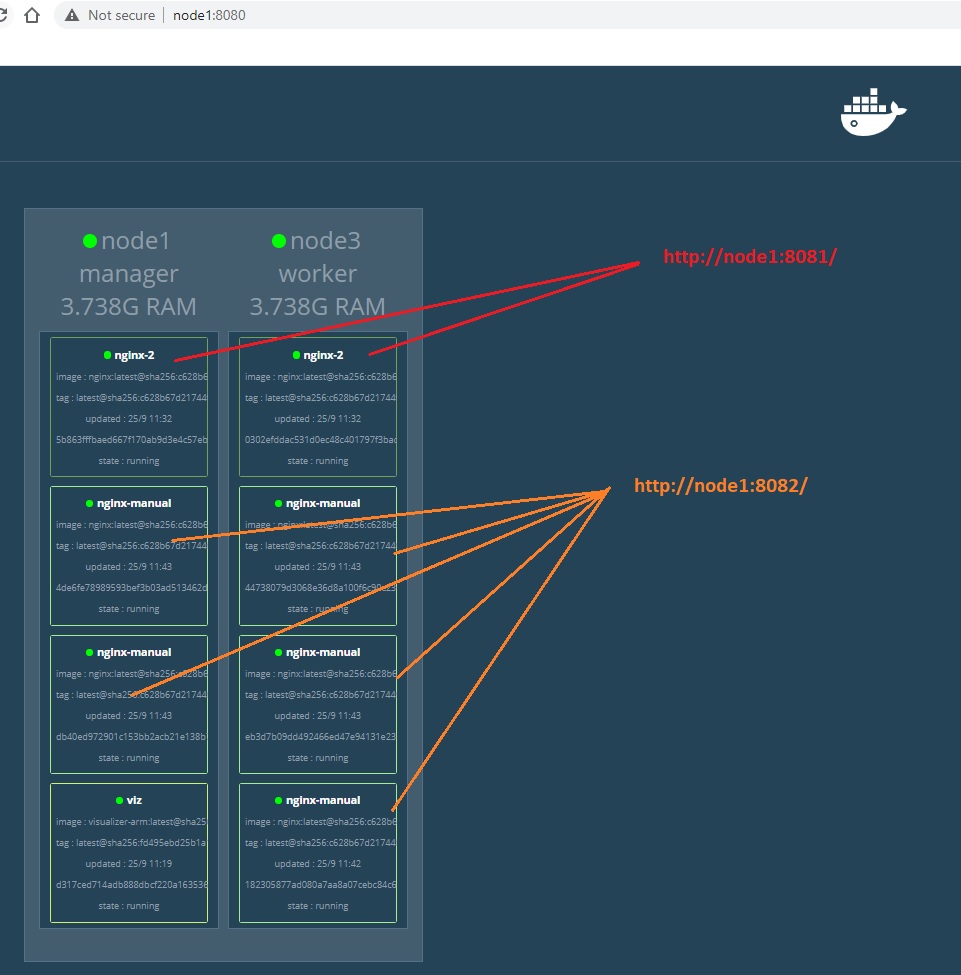
nginx-2 is then avaible at - http://node1:8081/. If you open one instance and a second in incognio you will see for the same DNS node1:8081 the Server name and Server address changes, this means the two requests were processed by different containers (not necessarily nodes but if you use this information along with what you see in visualiser you can prove they are on different nodes).
To manually scale create the server nginx-manual below.
1 | docker service create --name nginx-manual -p 8082:80 carlpaton/nginx-pi-demo ~ create 1 instance |
nginx-manual is then avaible at - http://node1:8082/. Once its up, scale it out by 5. Note that this 5 will be the new total service count.
1 | docker service scale nginx-manual=5 |
If you want to scale down just run the same command but with a lower value like 2, the new service count for nginx-manual will then be 2.
1 | docker service scale nginx-manual=2 |
If you now look at the visualizer tool you can see Docker Swarm is auto load balancing between the nodes :D
Delete a service
To delete a service run rm, the below will create a dummy server nginx-delete and then delete it. WARNING! rm will trash the service without confirming.
1 | docker service create --name nginx-delete -p 8083:80 carlpaton/nginx-pi-demo |
Leave the swarm and join again
From a worker run the swarm leave to leave the swarm.
1 | ssh node3 |
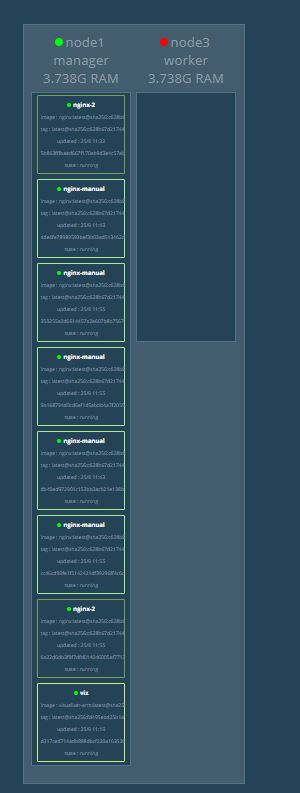
After leaving the swarm the manager node1 moves the load for you.
If you want to add the node back you need to first delete node completely from the manager.
1 | ssh node1 |
Add the node back as a worker using the swarm join command (see the start of this post).
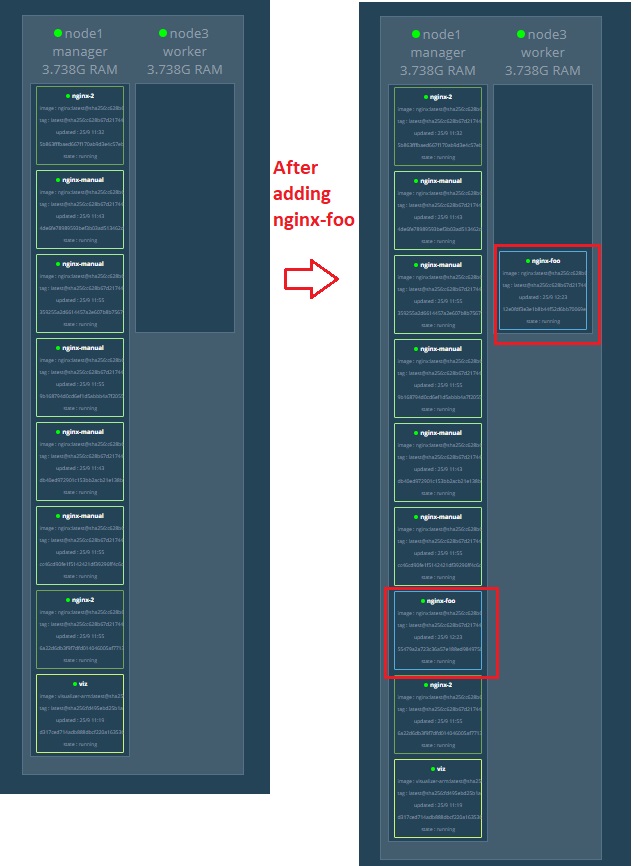
Even if you restart the service the nodes will not auto load balance (this is by design to avoid disruption). Swarm will add new services to nodes doing the least amount of work, so the idea is they will eventually balance out.
1 | docker service update nginx-manual ~ this restarts the service but will not load balance |
Rolling Update
You can upgrade versions of the running image by including --update-delay 10s when creating it. Then run docker service update [SERVICE NAME]
Shut Things Down
To shut down the nodes ssh to each and such them down, you need to do the workers first and then the managers.
1 | sudo shutdown -h now |
References
- https://nigelpoulton.com/blog/f/swarm-vs-kubernetes-2020-update
- https://docs.docker.com/engine/swarm/key-concepts/
- https://rancher.com/learning-paths/docker-swarm-vs-kubernetes/
- https://docs.docker.com/engine/install/debian/#install-using-the-convenience-script
- https://howchoo.com/g/nmrlzmq1ymn/how-to-install-docker-on-your-raspberry-pi
- https://howchoo.com/g/njy4zdm3mwy/how-to-run-a-raspberry-pi-cluster-with-docker-swarm
- https://github.com/dockersamples/docker-swarm-visualizer