Updated 17/04/2025
“Terraform is a popular infrastructure-as-code software tool built by HashiCorp. You use it to provision all kinds of infrastructure and services, including New Relic dashboards and alerts.” - docs.newrelic.com
In this post I will create an Error New Relic alert via Terraform, the resulting New Relic resources would be a provider, alert policy which is the parent, alert trigger which belongs to the alert policy and alert condition(s) which are children to the alert policy.
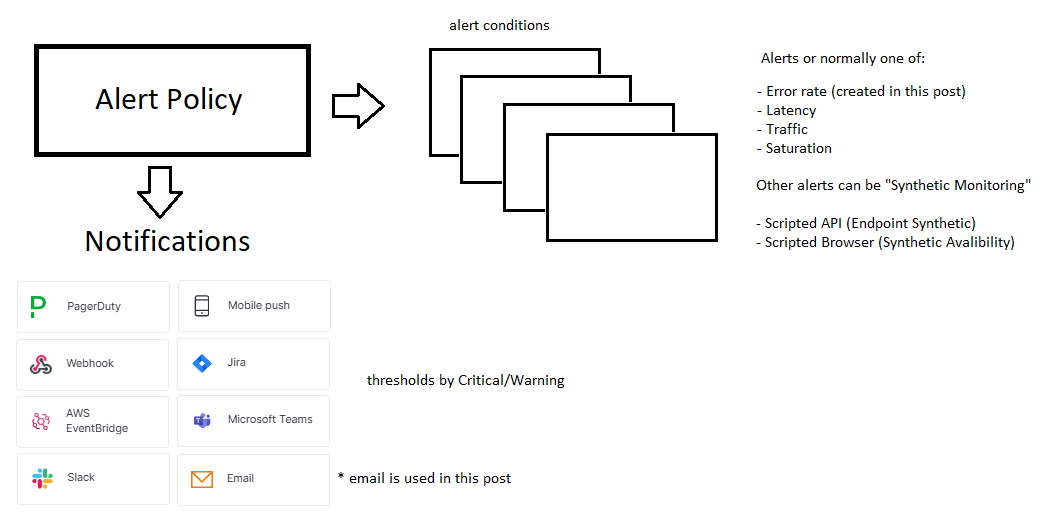
Alerts: Four Golden Signals From Google
For your alerts you need to think about whats sensible to alert on, Goole SRE is the golden standard, because you know… its Google :D … so you can re-invent the wheel or learn from their Golden Signals:
High Level Commands & Flow
- terraform configuration (or clone existing), for new configuration the provider the minimum requirement
- terraform init
- terraform validate
- terraform plan
- terraform apply
Required Terraform Config
The Newrelic docs have a great example which I based the below on, you will notice they are also focused on the Goole SRE Golden Signals
The high level config that I used to create my .tf files are
providers.tf- creates
terraform&providerresources - optionally includes a backend which is just a space to keep the
terraform.tfstate, Ive seen AWS S3 and Dynamo being used here- See Backend Initialization and Backend block configuration overview, the default is local
- creates
alerts.tf- alert policy (this is the parent)
- alert conditions (these are the children)
- alert triggers
locals.tf(optional)variables.tf(optional)
Additional abstractions
Locals
Locals are like constants in terraform, example locals.tf file with property newrelic_account_id
1 | locals { |
To access newrelic_account_id in another file like providers.tf
1 | provider "newrelic" { |
Variables
1 | variable "environment" { |
I set the environment in prod.tfvars, uat.tfvars files, example value environment = "uat"
You can access the map newrelic_slack_channels in a file, example locals.tf
1 | locals { |
Example Setup
- Install Terraform
Chocolatey makes this easy for windows users like me … sudo apt-get this 🖕
1 | choco install terraform |
- Create your initial config with
providers.tfandlocals.tf
providers.tf
1 | terraform { |
locals.tf
You can get this from your NR account under Administration -> API Keys
1 | locals { |
- Run
terraform initwhich will initialize the backend and provider plugins, mine created these files/folder locally. I manually modified mylocals.tfwith my account id and api key.
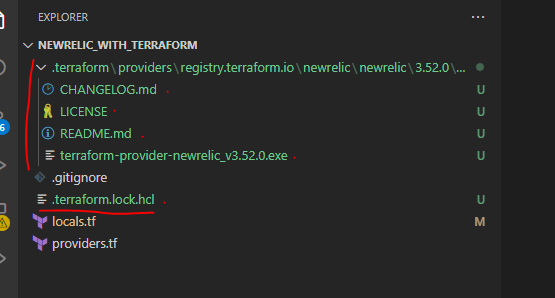
I then also updated my .gitignore with the config below
1 | .terraform/* |
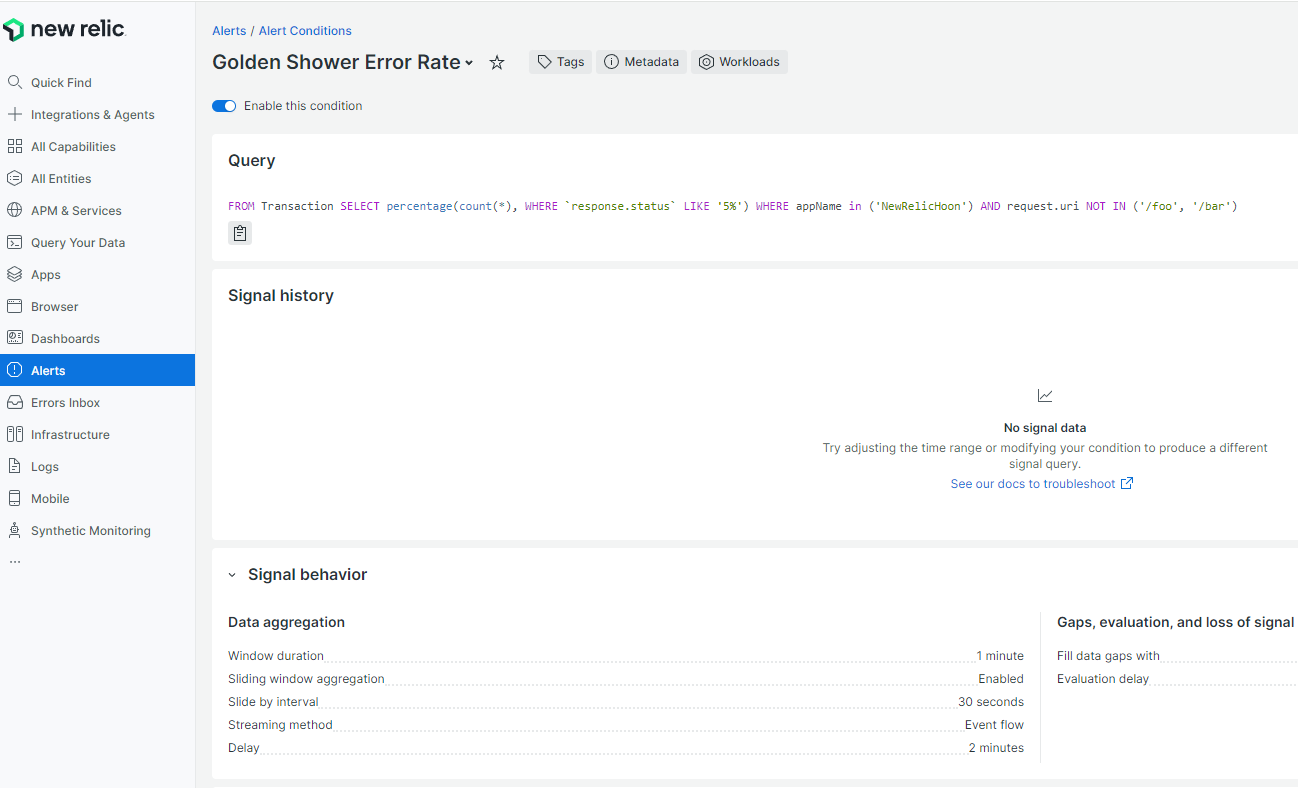
- Create
Alert Policy(parent) andAlert Condition(children) insidealerts.tf, here the alert condition is selecting fromTransactionwhich would be for web traffic originating from a NR client.
alerts.tf
1 | // *** Alert policy |
- https://registry.terraform.io/providers/newrelic/newrelic/latest/docs/resources/nrql_alert_condition
- https://registry.terraform.io/providers/newrelic/newrelic/latest/docs/resources/infra_alert_condition
variables.tf
Additionally create variables.tf
1 | variable "environment" { |
Run
terraform validateand fix any errors.Run
terraform planand specify the environment astestRun
terraform apply
The console will confirm the actions

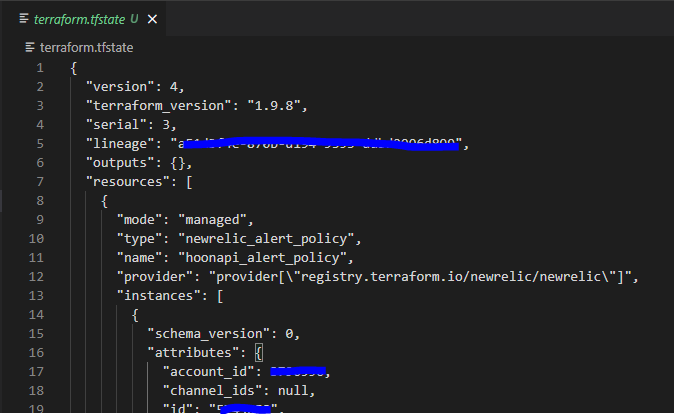
Additionall the local terraform.tfstate file will be created
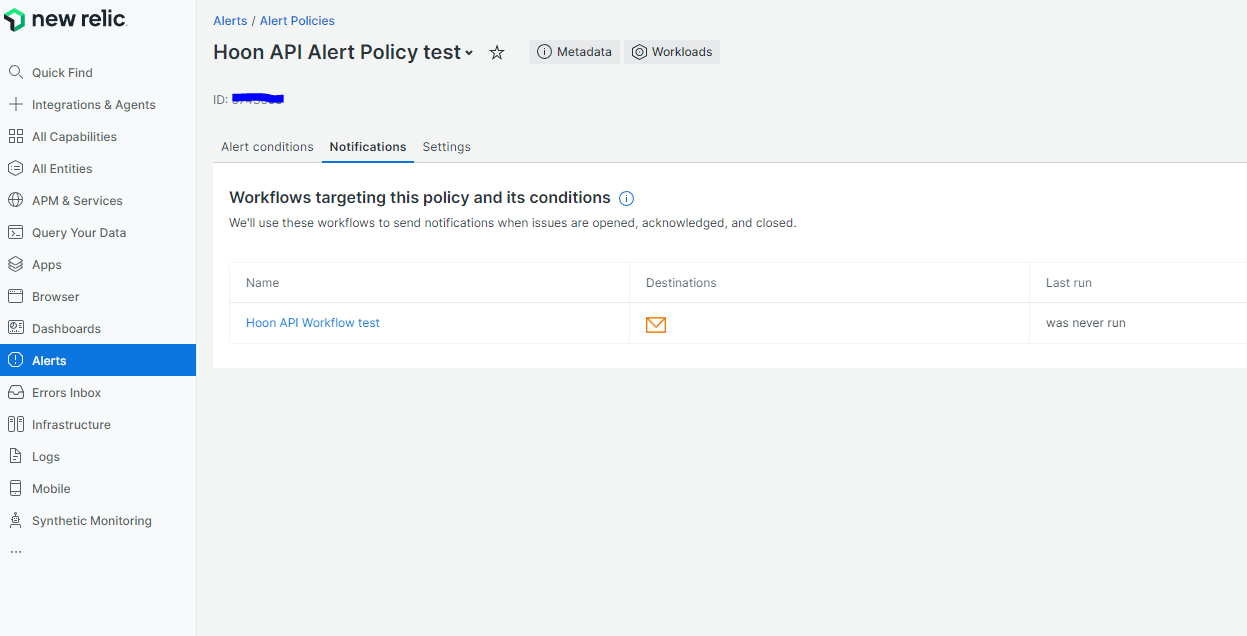
- Log in to New Relic and navigate to Alert Policies to confirm that Terraform created your new policy.
Alert Parent policy
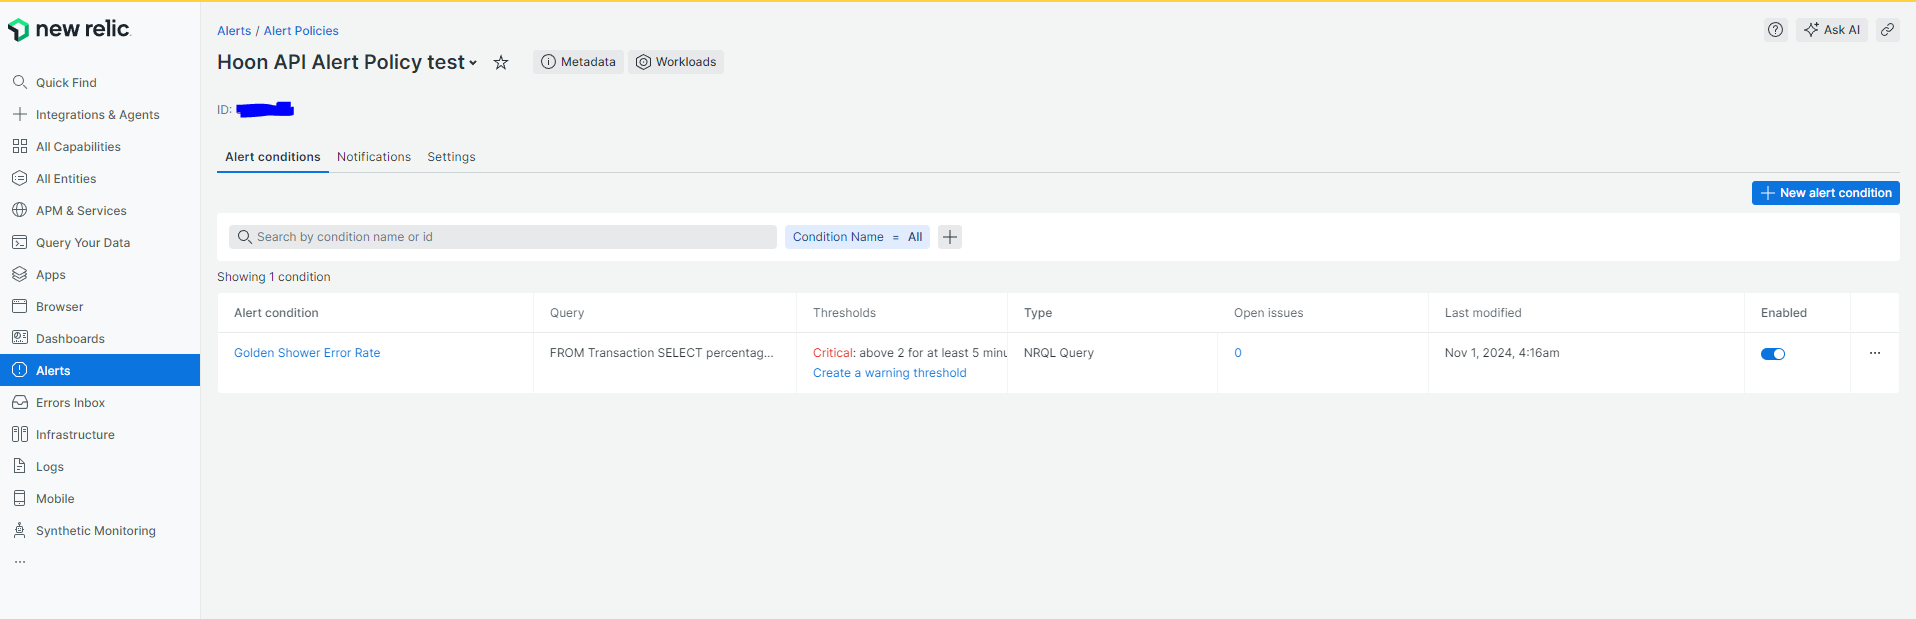
Child Alert Condition
- Add triggers, the example below is of type
EMAIL, others exist likeSLACK
trigger.tf
1 | resource "newrelic_notification_destination" "team_email_destination" { |
Run
terraform validateand fix any errors.Run
terraform planand specify the environment astestRun
terraform apply
You will notice the state updates and it creates a backup file for its internal process
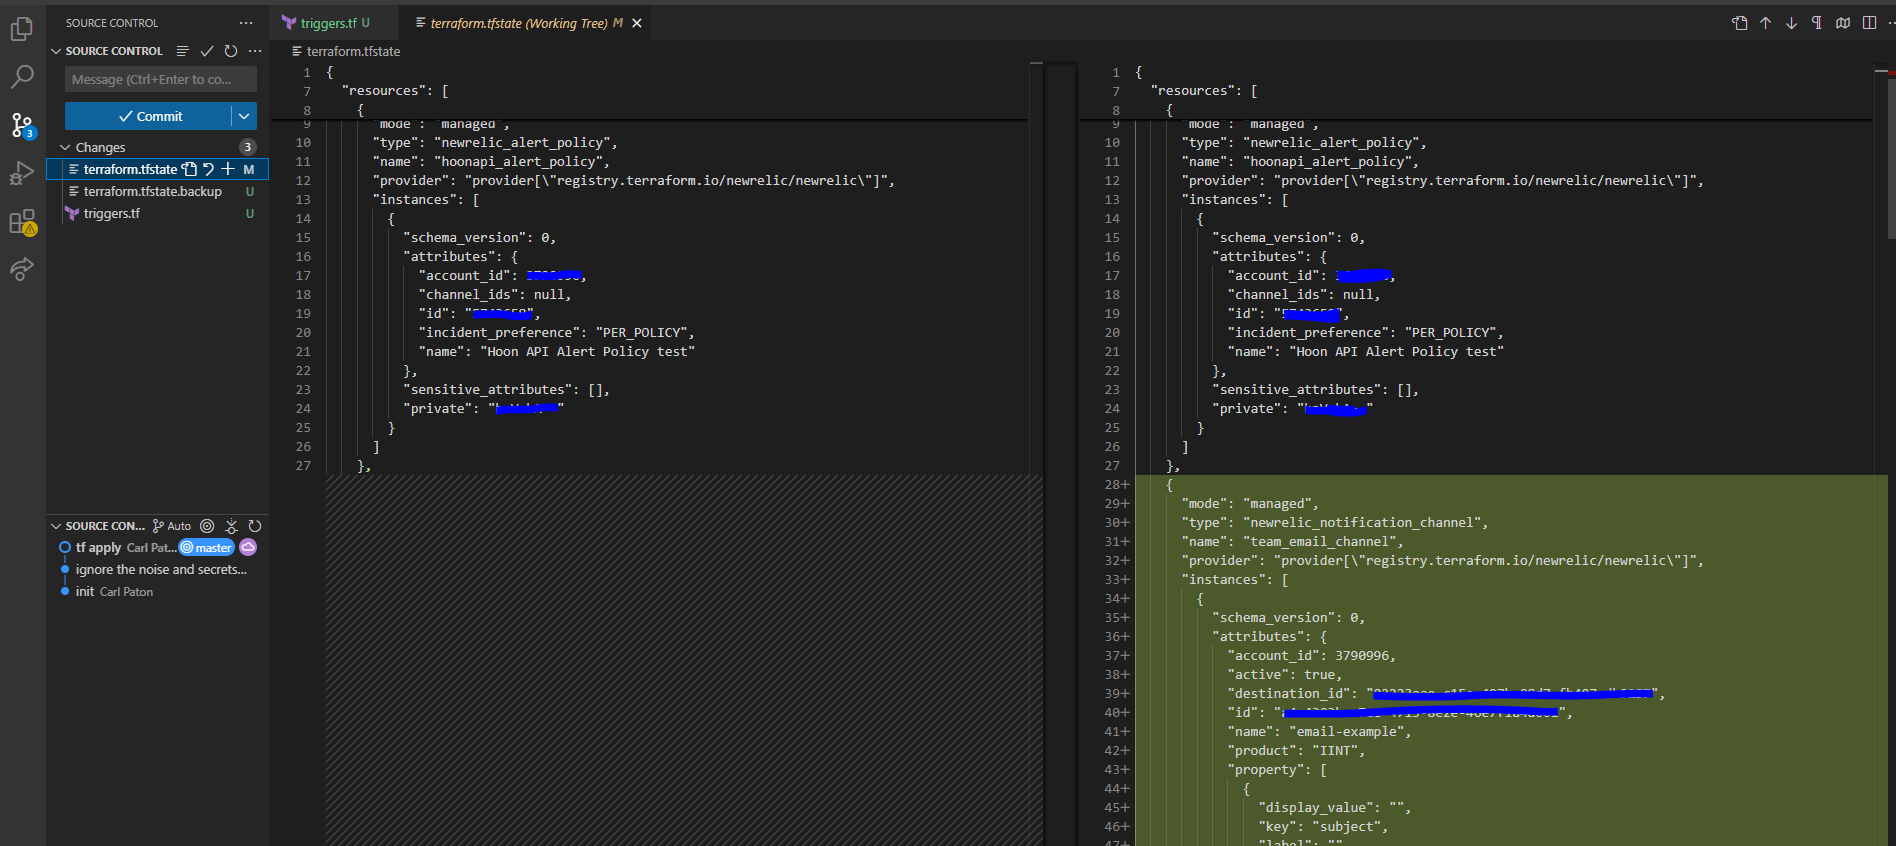
Then the notification can be seen under the policy
Synthetic Monitoring
“You can think of our synthetic monitors as crash test dummies for your websites, applications, and API endpoints.” - docs.newrelic.com
There are 3 types of monitors
Ping
- Would generally call a
/pingendpoint not needing any authentication but I have seen teams call/healthendpoints with this type - Doesnt have a synthetic script it runs
- The default is
type="SIMPLE"but can also have atype="BROWSER", the docs call it a SIMPLE BROWSER - Terraform resource is newrelic_synthetics_monitor
Scripted API
- Can be used to call a script, the script then calls an endpoint
- Terraform resource is newrelic_synthetics_script_monitor with
type="SCRIPT_API"
Example Scripted API From New Relic
1 | var assert = require('assert'); |
Real world Example Scripted API
This is still doing the same post and callback like the above but factors in how you could use this with an authentication mechanism (example OAuth2 Client Credentials Flow) and pass potential required headers ect.
1 | let assert = require("assert"); |
Scripted Browser
- Can be used to call a script, the script then calls your website and performs actions like login, asssert elements exist
- Terraform resource is newrelic_synthetics_script_monitor with
type="SCRIPT_BROWSER"
Example Scripted Browser From New Relic
This example is written using Selenium Webdriver version 3.6, so variables like $driver and $browser The current NR docs for Synthetic scripted browser use Selenium Webdriver version 4.1, so variables like $webDriver
1 | var assert = require('assert'); |
Real world Example Scripted Browser
This too is the same as the above but adapted something closer to real world.
Its sensible for the script to assert the existance of elements by a HTML property like data-automationid. While the data-automationid HTML property is not a formal web standard recognized by bodies like the W3C, it has become a widely adopted best practice and a de facto standard within the software testing and quality assurance community, especially for synthetic testing.
1 | $browser |
Secrets Security
We dont want secrets commited to source control, the examples above were password
We can use a resource newrelic_synthetics_secure_credential to instead manage the secret, the example below is from the docs, you would then reference it in the alerts above using $secure.MY_KEY
1 | resource "newrelic_synthetics_secure_credential" "foo" { |
After applying the above, from NR UI -> Synthetics Monitoring -> Secure credentials -> locate by name -> Edit secure credential
Alerts
Synthetic Monitoring Alerts use the same resource type newrelic_nrql_alert_condition as mentioned above for the alerts.tf file, the only difference is where they select their data from:
Example Ping (The simple one)
1 | nrql_query = "FROM SyntheticCheck SELECT percentage(count(*),WHERE result != 'SUCCESS') WHERE monitorName = 'Foo - Synthetic Availability'" |
Example Scripted Browser or Scripted API
1 | nrql_query = "SELECT count(result) FROM SyntheticCheck WHERE result = 'FAILED' AND monitorName = 'Foo - Page Load Synthetic'" |